Adding a Project
There are a few steps to adding a project.
- Add a gallery
- Create a blog post
- add gallery to blog post
- Add additional info to blogpost (thumbnail, excerpt, clients and categories)
- Publish
If you want to add moving image, the process is slightly different - but we will look at that later.
Step 1 - Enter the Content Library

Click the a icon from the Site Manager area to enter the Content Manager
You should see a panel with the title Navigation at the top. below that, two sub titles TOP NAVIGATION and NOT LINKED.
TOP NAVIGATION are the links that appear at the top of your website and are what the public can see.
NOT LINKED means that there is no way to click through to these pages without a direct link.
Step 2 - Create a gallery
Under the NOT LINKED header there is a folder called Galleries and below that, all galleries that have so far been created in this folder. Below all these is a link called + Add Page. Click on this.
A pop up will appear. Select Gallery. From here, another pop-up will ask you to name the gallery. Give it a memorable name related to the content you intend to put into it.
Once you have created a gallery, you just drag the photos you want to use, in the order you want to use them into the gallery. For further info on how to do this, you can watch a tutorial video here.
Step 3 - Create a blogpost
So we have created the gallery. Now we need to put it into something so it can show on the front-end of the website.
Under the TOP NAVIGATION title in the Content Manager, click on the Work link.
This is essentially a blog that has been heavily styled to look like the site as you know it. You will see a list of existing posts (or projects in your case), in chronological order. The chronology affects where these projects appear on your site. Older posts will appear further down the list, newest at the top. You can alter dates of blogposts to affect their position in the site.
To create a new post, click on + Add Post in the top right.
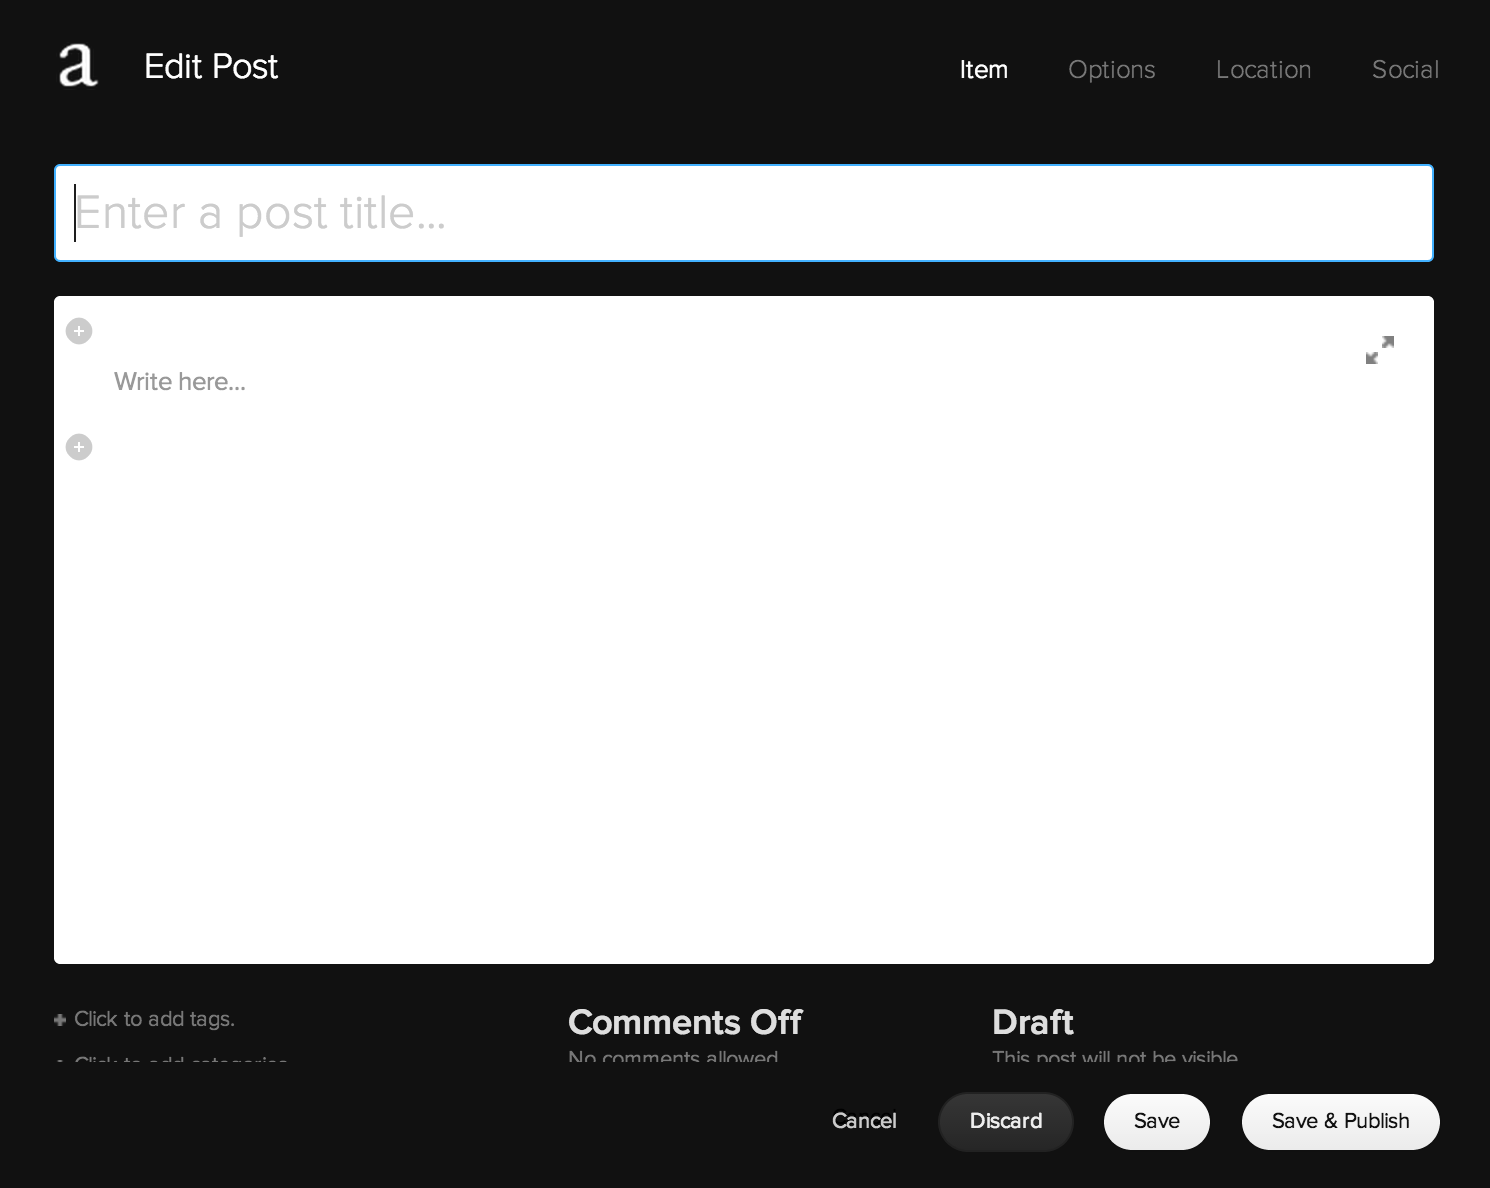
Name the project as you wish it appear in the front page.

In the larger window it will say write here...
Hover your mose just above this and to the left. You should see a black circle and line appear with a plus in it like above. Click on the +.

Now a pop up will ask you want you want to insert into the page. We want to select GALLERY.

Once we have selected Gallery, we want to choose which gallery. You have two options, create one there and then or Use an Existing Gallery. This is the one we want. Click on this tab and then select the gallery we created previously.
Step 4 - Add additional info to blogpost
Almost there.
Firstly, we want to tell the public what client this project belongs to and what category it sits in.
In the item tab, at bottom left are two links.
+ Click to add tags
+ Click to add categories
Tags refer to your clients (e.g. Debenhams) and categories to the type of project (e.g. Beauty).
You should choose ONE tag per project. If the client already exists it should appear as you begin typing. As it appears, select this.
Try to use categories that already exist (see the front end of your site if you're unsure what).
In order for the image to show on the front page and for text to show when users click the i button in a project we need to a little bit more info.
Firstly we need to add a thumbnail image. This is the one on the front page.
In the edit post window there are four links in the top right: Item, Options, Location and Social.
We want to select Options
In the options tab we are interested in two parts. The thumbnail Image and Excerpt.
The thumbnail image should be one that best represents that gallery/project.
As for excerpts, keep them short and style credits in Heading 3 by clicking on the 'format' dropdown (it may say Normal rather than format) in the text editor.

Step 5 - Publish
To publish the post, click on Save & Publish in the bottom right hand corner.
To save as a draft, to maybe come back to later, click Save. This won't publish it to the front page, i.e. the public won't see it.
Add a moving image to a gallery
To add moving image, you have to do it in a strange way.
For some reason, Squarespace won't let you add video to a gallery in the way we have just described.
You should follow steps 1-3 of adding a blog post, but rather than inserting an existing gallery we need to create one within the post. You can do this by selecting the Upload Media tab rather than the Use Existing Gallery tab.
In this tab you see a square with a plus in the bottom right. Click on this and you will be given the option to add image media or add video.
From here, the form should be self explanatory. It is worth noting however that videos need to be hosted externally. We recommend Vimeo. You should also tick the image overlay checkbox.
You can also add images to the gallery (i.e. mix moving image with static), however they will be treated slightly different to the other galleries you have or will create.
After you have done this, follow steps four and five as before.
Other Links